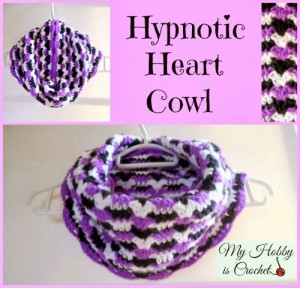
 I bought the Paton Silk Bamboo yarn probably last summer. You know the deal…..You go into the yarn store just browsing through all the wonderful choices when you see something you’ve not seen before. It gets worse though because then you have to touch it. Yep, bought 2 skeins and brought them home to sit nice and pretty on the shelf.
The other day I was looking for some yarn to play with for a scarf when I saw the beautiful ivory yarn waiting patiently. I picked up a hook and started working with the pattern. I knew right away I loved the stitch but it was a little tighter than I wanted from using an H hook. The pattern calls for front post double crochet stitches which gives the scarf great texture. I decided to really loosen up the stitch and chose a J hook. Perfect….
The great thing about this particular pattern is that you don’t have to worry about your gauge so much. If you like the tighter stitch then just drop a hook or two. Another plus is that sometimes a project will have a distinctive “front” and “back” look to it. Not this pattern and it’s because of the front post double crochet stitching. The pattern looks the same either way. There is no front or back to this one. Yay!
I hope you enjoy the scarf pattern and would love if you placed it in your QUEUE on Ravelry!
Supplies:
- Yarn – Patons Silk Bamboo #3 weight or yarn of your choice.
- Hook – J/6.0
- Tapestry needle for weaving in the ends
Gauge: Gauge is not really that important using this scarf. It’s very versatile to meet your desired length and width.
Note: The stitching for the scarf is really textured. I realize that I used a large hook for the type of yarn but trust me, once you start making your project, you will realize the endless possibilities of any type of yarn and hook size that you want, and it gave the Patons Silk and Bamboo the perfect look for me.
Abbreviations:
ch – chain
dc – double crochet
fpdc – front post double crochet (YO, pick up a loop front from front, insert hook from right to left under specified st, (YO, pull through 2 loops)twice.
hdc – half double crochet
sc – single crochet
Vst – V Stitch – (1 dc, ch 1, 1 dc) in same st for the first row then afterwards (fpdc, ch1, fpdc)
YO – Yarn Over
NOTE: You will always skip the sc stitch behind the fpdc just made.
Ch a multiple of 4 plus 3 (For my scarf, I chained 24 +3)
Row 1: Vst in 5th ch from hook, *skip next ch, sc in next ch, skip next ch, vst in next ch* repeat from *to* across, ending last repeat with a sc in last st, turn
Row 2: ch 2 (counts as hdc here and throughout), *sc in ch-1 sp of next vst, (fpdc, ch 1, fpdc) around post of next sc* repeat from *to* across, ending last repeat with sc in ch-1 sp, hdc in top of turning ch, turn.
Row 3: ch 2, *(fpdc, ch 1, fpdc) around post of next sc, sc in ch-1 sp of next vst*, repeat from *to*, across ending last repeat with (fpdc, ch1, fpdc), hdc in top of turning ch, turn
Repeat rows 2-3 until you have reach your desired length leaving a long tail.
If you want an infinity scarf, bring the ends of the scarf together. Using your tapestry needle, insert the needle into the bottom loop of the beginning row and in the front loop of stitch on the other end of the scarf and whip stitch them together, repeating the steps across.
Do you love the flower on the scarf? It’s a free pattern from My Hobby is Crochet and was perfect for the scarf. I’m not a flowery kind of person, so something simple but elegant certainly complimented it. Thank you Kinga for writing such a great pattern with a photo tutorial. It really was easy to follow! If you want to attach the flower to the scarf leave a long tail for sewing. I didn’t attach my flower because I may want to make a few different colors.
I hope you enjoy the pattern. Have a great day! Be blessed.
Kathy


