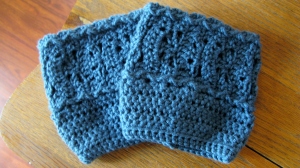
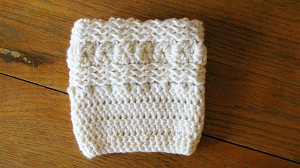
Here’s another free boot cuff pattern. I really like the way this cuff turn out. Now I’m ready to see what it looks like in some different colors. I hope you enjoy this pattern and if there are any errors, please feel free to let me know! The only way to improve is feedback!
UPDATE 02/03/13 – I had an error and had an additional row of dc’s. This has been corrected. I am sorry for the confusion.
Supplies:
- I used I LoveThis Yarn medium (4) worsted weight. The color I used was ivory.
- Crochet Hook Size – H
- Tapestry needle for weaving in the ends.
Special Directions: Sideways cluster
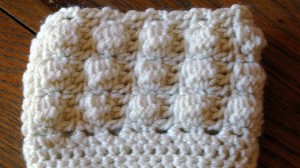
(YO, insert hook around post of last dc, YO and pull up a loop, YO and draw through 2 loops on hook) 5 times, YO and draw through all 6 loops on hook.
Abbreviations:
ch – chain
st – stitches
sc – single crochet
hdc – half double crochet
dc – double crochet
sl st – slip stitch
YO – Yarn over
Sideways Cluster – see special directions
Gauge: 8 stitches and 3 Rows = approximately 2 inches.
Top Portion of Boot Cuff
Ch 14
Row 1: dc in third ch from hook and in each ch across, ch 3 turn. (12 st) (ch3 counts as first dc here and throughout)
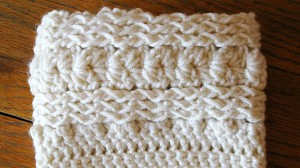
Row 2: dc in next two dc, work sideways cluster, *skip next dc, dc in next two dc, work sideways cluster repeat from *1 more time across to last dc, dc in top of ch 3, ch 3 turn. (12 st.)
Row 3: dc in next dc, dc in next 2 st of top of sideways cluster, dc in next dc, *dc in next 2 st of top of sideways cluster, dc in next dc, *repeat 1 more time and across to last dc, dc in top of ch 3, ch 3 turn. (12 st.)
Repeat rows 2 and 3 until the desired measurement ending with row 3. Fasten off leaving a long tail.
Turn pattern wrong side out and join ends together using the long tail and take the side just fastened off using the tapestry needle to sew the front loop only of the stitch and the bottom loop of each sc on the first row. Fasten off and weave in the ends. Turn pattern right side in before working the bottom part of the cuff.
Bottom Portion of Boot Cuff
Row 1: Join to cuff by ch 1 and sc evenly around, sl st into first sc (not the ch 1). (Hint) You will later be decreasing stitches so be sure that your stitches will divide by 4 evenly then add two more sc. (Example: Sc 40 stitches plus 2=42 stitches around.) 42 will actually be a good number to use on the average size cuff.
Row 2: ch 2, dc in next sc and around, Sl st in top of ch 2 st.
Row 3: ch 1 and sc in same sp, sc in next dc and around, sl st in first sc.
Row 4: ch 2, dc in next sc and around, Sl st in top of ch 2 st.
Row 5: ch 1 and sc in same sp, sc in next dc and around, sl st in first sc.
Row 6: ch 2, dc in next sc and around, Sl st in top of ch 2 st.
Row 7: ch 1 and sc in same space, sc in next 3 sts, *skip next sc, sc in next 4 st*, repeat from * to * across, sl st in first sc.
Row 8: ch 2 and hdc in next sc and around, sl st in top of ch 2 st.
Row 9: ch 1 and sc in same sp, sc in next hdc and around, sl st in first sc. Fasten off and weave in ends.
Add buttons if desired.
Please feel free to make or sell products from this pattern! I believe in free enterprise but just ask to link back to my site. Please do not copy this pattern as your own. Please do not re-publish photos as your own. You can also follow me on my ELK Studio Facebook page for updates of upcoming pattern releases!


